Knowing where and how to ford a fast-flowing river is one of the most important backcountry skills that a hiker can acquire. Let’s break it down into four steps:
- Where to Cross?
- Preparation for Crossing
- Fording Techniques
- Worst-Case Scenario

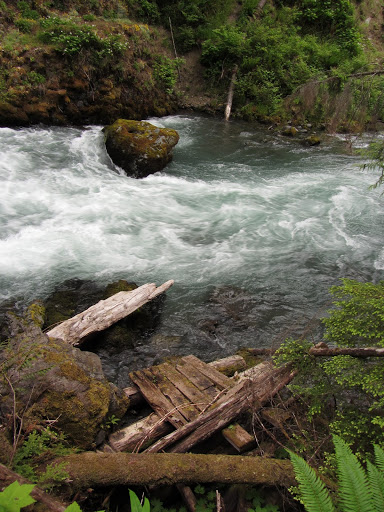
Sometimes there’s a fine line between fording and swimming | Copper Canyon Traverse, Mexico, 2013.
Where to Cross?
Far too often people rush into the water without giving much thought to what they are doing. Often the ideal place to cross is not where the trail meets the river. Take time to assess your options.
What to Look For?
- Swiftness & Depth: If the river is fast-flowing and above knee depth then it is potentially dangerous. If it is above thigh height and moving quickly, it may be a good idea to either rethink your crossing point or make camp and try again the following day. Note that it is easier to ford snow-fed rivers early in the morning, as progressively warmer temperatures mean that water levels will rise throughout the day.
The very appropriately named “Swift Creek” | Olympic Peninsula, Pacific Northwest Trail, 2011 | On this particular occasion, I spent the best part of a couple of hours bushwhacking up and down the watercourse before finding a safe place to ford.
- Width: Generally speaking, look for a spot that is wide and shallow/braided, with feasible points at which to both enter and exit the water (i.e. avoid high banks). Avoid crossing at narrow (“choke”) points where the current will be strongest.
- Run-out: If the crossing is a difficult one, investigate where the river is heading in case of a fall. Avoid crossing anywhere that the run-out leads to dangerous rapids or waterfalls.
- Character of Riverbed: Riverbeds are uneven. Before crossing assess the riverbed for potential snags and holes. If the water is surging, murky and full of large debris, either bide your time or look for an alternative crossing.
- Patience: Once the river has been scoped for potential crossing points, if you and/or your group are still having serious doubts as to the feasibility of a ford, it is usually wiser to be patient, set up camp and wait until conditions improve.

Fording Heaven – Wide, braided, relatively even | Skoga River | Skogar – Landmannalaugar, Iceland | 2000
Preparation for Crossing
- Protection: In addition to your backpack liner (e.g. a large trash compactor bag), it is a good idea to have all of your electronics and any other valuables stored safely inside smaller waterproof bags. Before crossing, tie off your pack liner with a knot and/or thick rubber band; if sealed correctly, the trapped air will act as a buoyancy aid in case of a worst-case scenario (see below).
- Minimize Resistance: Avoid wearing baggy pants or skirts. Strip down to your undies or go commando if you have to. You basically just want to avoid anything that will add extra resistance. On that point, hikers that strap their foam sleeping mats to the outside of their backpacks, will want to make sure they have them attached to the top, rather than the bottom of their packs before attempting a difficult river ford.
- Keep Your Shoes On: If the crossing is a difficult one, keep your shoes on. Wet feet are a small price to pay for the added protection, traction and stability that shoes/boots can offer.
- Loosen Up or Unbuckle?: Over the years I’ve tried both methods. Personally speaking, I prefer the former. When fording a fast-flowing river over an uneven bed, I want to feel as balanced as possible (Note: Carrying a lightweight pack helps). Unbuckling your backpack leaves you vulnerable to load shifts during a ford. My preference is to stay clipped in, but before a potentially difficult crossing, slightly loosen my hip belt, shoulder, and sternum straps. Not too much, as this can lead to instability, but just enough that if I do happen to go into the drink, I’m able to unbuckle immediately without issue.
Note: This particular point flies in the face of conventional river fording wisdom. Most articles you read on the subject advise hikers to undo the hip belt and sternum strap before crossing. I’ve occasionally wondered whether some of the folks writing these pieces are simply regurgitating the same old thing. I can only speak from my own experiences over the past few decades. During this time I’ve crossed a lot of fast-flowing rivers from the Yukon to the Himalaya to Southwest Tasmania. The only times I’ve taken a tumble were back in 1998 (Alaska) and 2008 (Ladakh), when I did so on purpose in order to test both the buckled and unbuckled methods. Both trials were done on nice warm sunny days (I’m not a complete nutter). Having said all that, I’ve probably just jinxed myself into falling arse over tea kettle next time I cross a meandering, ankle-high stream.

Lamayuru to Serchu | Ladakh, Indian Himalaya, 2008.
Technique for Crossing
The Tripod or Quadpod Method
An extra “leg” or two in the form of hiking poles or long, sturdy sticks, can be of great assistance in aiding balance and stability during difficult river crossings. For ease of reference, the following bullet points refer to the Tripod method (one pole), however, the same technique applies to the Quadpod version (two poles) as well.
- Enter the water facing upstream. Use your pole for stability. Grip it with both hands.
- Bend at the knees and lean slightly forward into the oncoming water. Your pole/stick is directly in front of you acting as an extra point of contact. Think of a sumo wrestler trying to keep their centre of gravity as low as possible.
- In your tripod/low profile stance, proceed to slowly shuffle across the river. Make things easier by angling slightly downstream (while still facing upstream) rather than straight across, as this will mean you are moving with the current, rather than fighting against it.
- Test each foothold as you go; foot entrapment is one of the principal reasons people fall during crossings. The stick/pole will act as a depth tester and stabiliser. Shuffle steadily, but never rush; this particularly holds true if you are making your way over slippery rocks.
- If you reach a point during the ford in which it feels unsafe to continue (i.e. the river is faster and/or deeper than expected), don’t be afraid to turn back and look for an alternative crossing point, or wait for water levels to subside.
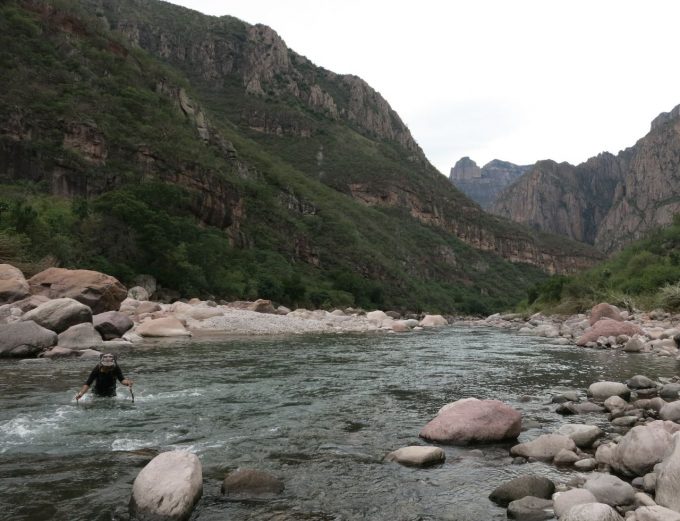
Crossing the Rio Verde using the ‘Quadpod’ method | Copper Canyon Traverse | Mexico, 2013 (photo by Justin “Trauma” Lichter)
Group Crossings
If the ford is difficult and you are hiking in a group, there are multiple options available:
- Each member crosses solo, with others from the party taking turns at positioning themselves downstream so that in case of a fall, they are better able to offer assistance in the form of a rope, hiking pole or long, sturdy stick. The strongest and/or most experienced member of the party should ideally go first in order to scope out the safest route.
- The group crosses together using the Mutual Support Method with members holding on to one another’s shoulder straps or waist belts for support. The party enters the water in a line angling slightly downstream, with the strongest / heaviest member anchoring the group at the upstream end.
Worst-Case Scenario
In the event that you fall and are swept away by the current:
Regain your composure
After the shock of falling, your primary concern should be reaching the safety of the shore. There will be plenty of time to worry about whether or not your stuff is still dry once you are out of the water.
Backpack – Hold or Release?
If a fall occurs and you are swept downstream, you need to be able to either quickly release your pack or hold it against your chest for buoyancy purposes. The one place you do not want it is against your back, where it will act as a weight in dragging you down. There are two schools of thought:
- The first is in favour of keeping your pack, as the trapped airspace inside of the sealed bags will help to give you buoyancy. Sort of like a makeshift lifejacket. The negative associated with this strategy is that it only leaves you with one arm to swim, thus making it more difficult to reach the shore.
- The second school of thought maintains that you should release your pack, thereby making it easier to actively swim to the shore at the first feasible opportunity. The disadvantage to this method is that depending on the character of the river and terrain, you may not be able to retrieve your pack, which subsequently could prove vital to your chances of survival.
My Choice?: I will always keep hold of my pack unless I’m in imminent danger of being swept down treacherous rapids or over a waterfall. In such an unlikely scenario (see Run-Out in Where to Cross?), my best chance of reaching shore may lie in swimming with both arms.

Sarek National Park | Lapland, Sweden, 2009.
Position
If the current is extremely swift and reaching shore isn’t an immediate option, position yourself so that you are floating on your back with your feet facing downstream. If collisions with river obstacles occur, better your feet than your head taking the brunt of the impact.
Terra Firma
Once you have reached the safety of shore your priority is to get warm and dry. Do some pushups and jumping jacks if necessary. If you still have your pack, slip into any extra clothes you may be carrying.
If your pack has been jettisoned………….good luck searching! If you are solo and your search proves fruitless, depending on the prevailing conditions and how far away you are from civilization, you may need to build a fire in order to warm yourself and dry the clothes you are wearing. Note, this may not be such an easy task if your lighter and/or matches were stored in your pack. If you are part of a group, now would be a good time to beg and borrow from your hiking buddies.
Discover more from The Hiking Life
Subscribe to get the latest posts to your email.
You might want to point out that you need to face upstream so you wont be blind sided by a log or other debris in swift current.
Please see the first bullet point in the “Technique for Crossing” section.
This is some excellent advice! River crossings can be scary things…
This facing angle and crossing angle thing has never been clear to me as facing upstream helps with balance but makes you work against the flow if you cross upstream. So as per your advice, face upstream to enter the water to assess conditions, then turn and head downstream at a slight angle to cross? is this the correct interpretation?
No. You cross at an angle heading downstream (thereby decreasing resistance), while continuing to face upstream. During the ford, periodically glance sideways towards the opposite bank in order to gauge your progress.
Cheers,
Cam
OK, thanks. Never tried that. So you step sideways? This sounds a bit odd but I understand the reasoning. I’ll try that next time. The whole article makes a lot of sense, thanks for sharing
Awesome piece, tks
Thanks for the info, J.
Excellent piece. This is the same principles we learn in Swift Water Rescue for white water boating. The tripod is especially effective. For groups this is also very useful, crossing as a wedge, always facing upstream. I like the idea of crossing at an angle to decrease resistance, probably do this unconsciouslly in swift water anyway. Its probably a bit like ferrying I suppose.
Emergency signaling device, fire starting tool/matches, and (if needed) short-term critical medications in sealed waterproof bag on one’s person–zipper pocket perhaps–before beginning a crossing in which the main pack could be lost. Not that I’ve performed such a scenario, just an abstract thought upon reading your excellent article. Also, thinking about doing practice water crossings around home between trips.