“Mankind differs from the animals only by a little and most people throw that away.”
~ Confucius (551-479 BC)
There is no foolproof system by which you can avoid bites, stings and attacks. The best you can do is educate yourself, take the necessary precautions and try not to worry.
Snakes
Snakes aren’t interested in biting hikers.
Whether you’re walking down the trail, sleeping under the stars or taking a sneaky number two behind a not-quite-big-enough bush, snakes want to avoid a potential encounter just as much as you do.
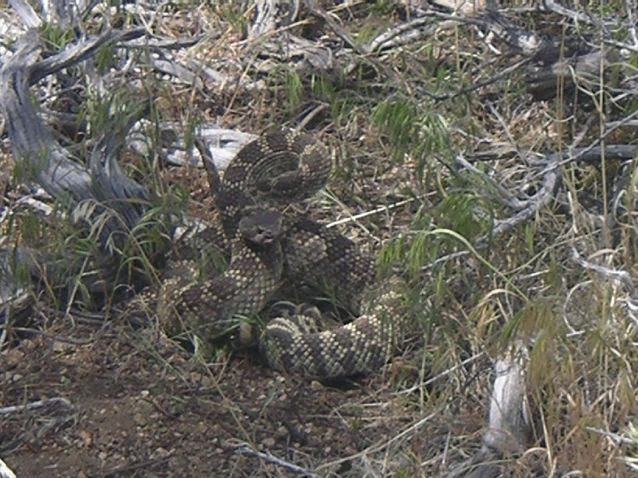
Rattle Snake | Pacific Crest Trail, Mojave Desert, CA, USA, 2007
That being said, snakes will protect themselves if the need arises. Put yourself in their skin; if someone was about to step on you, wouldn’t you do everything in your power to prevent it happening?
Snake bites generally occur due to human carelessness or lack of awareness. Keep your wits about you, take the necessary precautions and the chances of being bitten are remote. Listed below are preventative techniques and treatment tips for hiking in snake country.
Prevention
- Awareness: Without being paranoid, pay attention to the trail ahead of you.
- Placement: Don’t put your hands on unseen rocky ledges or hollowed out logs.
- Off-Trail: If bushwhacking in a snake-infested area it is a good idea to wear pants or gaiters.
- Footwear: Whilst taking a pee in the middle of the night, put on some footwear and carry a headlamp/torch. I’m not quite sure what happens if you pee on a snake. I don’t imagine they would be too happy about it.

Tiger Snake | Bibbulmun Track, Australia, 2010
Treatment
Different snakes produce different types of venom. As a consequence, certain First Aid recommendations for snake bite are country or regional specific (see Treatment in Australia below).
Nonetheless, there are a handful of widely accepted steps that the victim can take irrespective of their geographic location. Ten Tips on what to do if bitten by a snake:
1. Stay calm: People are more likely to go into shock from fear and agitation than they are from the actual bite itself.
2. Do not try to capture the snake. If the snake is still in view and you aren’t sure of its species, take a photo of it for identification purposes. This would probably be a good time to use the zoom if you’re looking for a close-up. Definitely no “group selfies“………I was going to put a little smiley face here, but I suspect there have been numerous yahoos that have actually done this.
3. Do not use antiquated methods such as cutting the area, sucking out the poison or applying a tourniquet.
4. The value of Extractor Pumps is questionable at best, and their use is not recommended by snakebite experts.
5. Remove any jewellery in case of swelling.
6. Do not drink alcohol or caffeine.
7. Limiting movement is vital. If possible, immobilize the bitten limb with a splint. Firm, but not too tight, as you need to allow for swelling.
8. If you are close to trailhead, slowly walk out and then seek medical attention immediately.
9. If you are a long distance from civilization and have cell phone service, call Emergency services and seek medical advice. If there is no phone service and you are hiking in a group, one of the members should walk out and seek medical assistance ASAP.
10. Hiking Solo: If you are hiking solo and have no cell phone (or at least no coverage) you are left with a decision to make. You either wait for help or walk out. If you are hiking in a popular area then your best bet is the former option. On the other hand if you are bitten in a place where the odds of someone coming along are slim, your only alternative may be to walk out. If this is your decision, do not rush as it will only increase the rate in which the venom is spread. In such a scenario, it is even more important that you splint the bitten limb in order to limit any unnecessary movement.
Treatment in Australia
My homeland of Australia is the deadly snake capital of the world. Yay for us. Indeed, it is the only country/continent in which the majority of snakes are venomous.
Since the 1970’s the recommended treatment for all snake bites in Australia is the Pressure Immobilization Method, a technique that differs from regions with mostly non-neurotoxic snakes (e.g. North America & Europe) in the following ways:
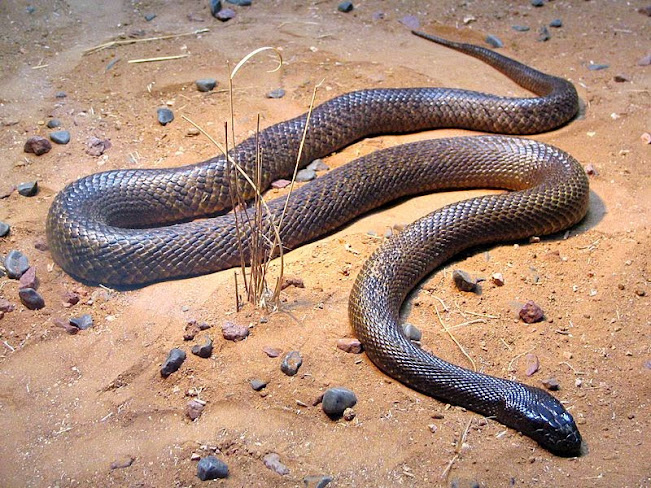
Inland Taipan – The world’s most venomous snake | Endemic to semi-arid regions of central east Australia (photo from Wikimedia Commons)
- In Australia it is recommended the victim DOES NOT wash the venom off the skin, as it may help in identification. This point in direct contrast to countries with non-neurotoxic snakes, in which medical authorities recommend immediately cleaning the wound with soap and water or antiseptic solution.
- Apply a Pressure Bandage / Pressure Immobilization Technique: Instead of washing the bitten area, in Australia the victim is recommended to immediately apply a pressure bandage to the extremity in question. Beginning with the lower portion of the limb, the bandage should be wrapped as high as possible; not to tight, not too loose. The purpose of the Pressure Immobilization Technique is to retard the movement of venom through the lymphatic system, by means of a combination of a firmly applied bandage and immobilization of the bitten limb. Click here for step-by-step instructions from the Queensland Government’s Poisons Information Centre.
- Alternative Bandages: If you are not carrying a broad pressure bandage, your best option is to tear strips from whatever clothing items you have in your pack. Stretchy items such as thermal tops and bottoms are ideal.
Final Word
If after reading the above paragraphs you are a little concerned, take solace in the fact that death by snakebite is extremely rare. You have more chance of being hit by a car or being struck by lightning. Indeed, I have spent a great deal of time hiking in the boonies of Australia over the years and have never once been bitten. That being said, most of my friends have……….a few of them are still alive. ![]()
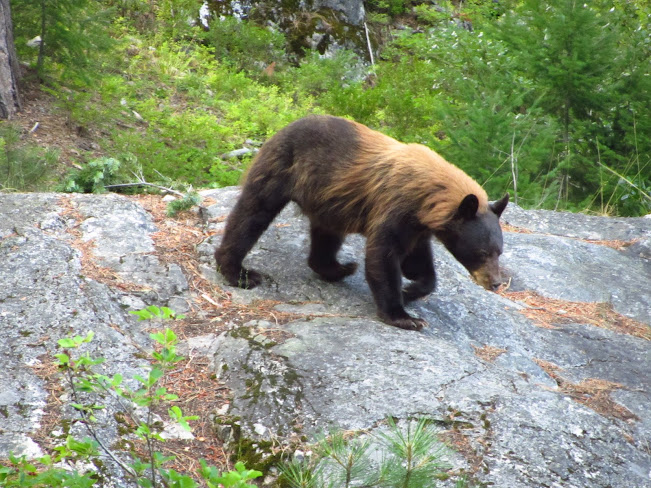
Bears
Bears are like snakes only bigger, hairier, and a little more intrusive if you don’t take the necessary precautions. The ideas expressed below are by no means foolproof or conclusive. Bears, like humans, are individuals. There are exceptions to every rule.
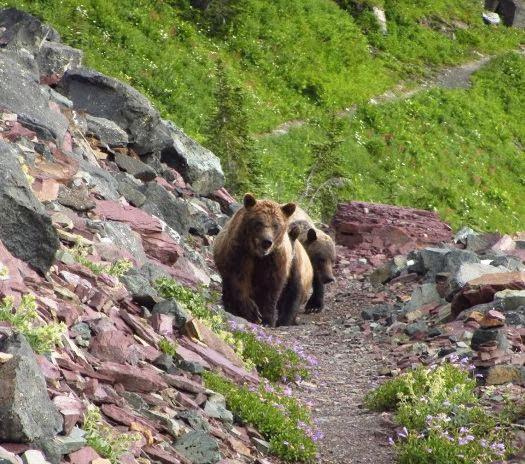
Three Grizzly Bears | Glacier NP, Montana | Continental Divide Trail, 2012
Precautions in Bear Country
- Don’t cook where you camp. Bears have an incredible sense of smell. Cook your main meal either at lunch or at least 30 minutes before setting up camp.
- Avoid popular campsites: Whenever possible try to avoid camping at popular campsites or campgrounds. Bears aren’t stupid. It doesn’t take them long to make the association between lots of careless campers and a potentially easy meal. By far the majority of bear “encounters” (all estimates I have heard are over 90%) occur at park campgrounds. When it comes to bears, the expression “safety in numbers” is definitely off the mark. If you do stay at popular campsites, utilize bear lockers or poles whenever available.
- Wild Camping: The alternative to camping at popular sites is known as wild or stealth camping. Basically camping in an unused spot, away from the trail, water sources and other hikers. If you choose to wild camp, the onus is even greater to practice no trace camping principles. Both your’s and the bears safety may depend upon it.
- Noise: When walking in thick forest or bush, be sure to make some noise. Sing, talk, recite poetry, whatever floats your boat. My personal choice is the traditional “hey bear” mantra. The objective is to negate the element of surprise. If bears hear you coming, chances are they will want to avoid an encounter as much as you do. That being said, I do not recommend bear bells. Quite frankly they are overkill. Their continuous jingling detracts from the sounds of the natural environment, which constitute a significant part of why I am out in the wilderness in the first place.
- Bear-proofing a campsite: Through a combination of using pristine/stealth sites and not cooking where you camp, you greatly minimize the chances of a bear encounter occurring. The next step is to bear-proof your campsite by protecting your food and any other items in your kit that may give off unnatural odours (eg. toothpaste, sunscreen, insect repellent, even the clothes you cooked in). Methods for doing this include Ursacks, hanging your food and bear canisters. It is worth noting that black bears are extremely good climbers, so if you choose to hang your food be sure to select a branch which is thin enough that it won’t hold the weight of a bear.
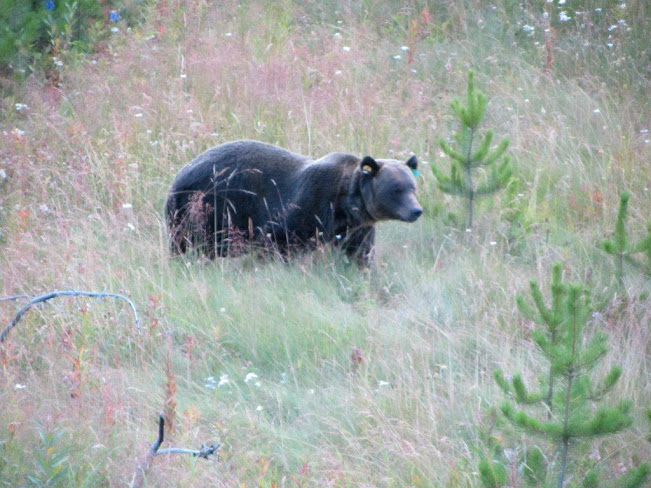
Grizzly at Dusk | Great Divide Trail, Canada, 2011
Bear Encounters
- Observe & Stay calm: If you see a bear from a relatively close distance stay calm and observe its movements. If it doesn’t runoff the moment it spots you, speak to the bear in a strong, calm and even tone. Crying and whimpering are not recommended. Raise your arms to make yourself look bigger and (in theory) more intimidating.
- No Eye Contact: Avoid making eye contact, which bears may take as a sign of aggression.
- Slowly Back Away: If the bear stands its ground, but otherwise seems disinterested, slowly back away not losing sight of the bear and definitely not turning your back on it.
- Don’t Run: In the event that all your precautions fail and you find yourself being charged by a bear, whatever you do don’t run. Bears can move at 50km per hour. By running you are making a less than ideal situation immeasurably worse.
Bruin heading down for an afternoon drink | Pacific Crest Trail, 2012
- The Bluff Charge: Most bear charges are bluffs. A bear will run towards you and at the last moment veer off. I know what you are thinking. It would take balls of steel to stand your ground in such a situation. Nonetheless, by doing so you improve your chances significantly. If you wear undies whilst hiking, I hope you brought a spare pair.
- Bear Spray: If it becomes apparent that the charge is not a bluff, use bear spray as a last resort. Wait until the bear is within 10 to 15 metres (32-49 ft). Just make sure you are not aiming the spray into the wind.
- Playing Dead: If a grizzly bear charge proves not to be a bluff and you are not armed with bear spray, drop to the ground and lay on your stomach. Spread your legs, tuck your head in, clasp your hands behind your neck and leave your pack on as this will protect your back. Be as still as possible. If the bear immediately loses interest, continue “playing dead” until you are sure that the bear has left the area.
- Last Resort – Grizzly Bears: Grizzly bears will only attack if they feel threatened. By lying as quiet and motionless as possible, the bear will soon realize that you present no threat and continue on its way.
- Last Resort – Black Bears: If you are being attacked by a black bear the protocol is quite different. If the attack is obviously predatory rather than defensive in nature, then chances are that the blackie has decided that you are on today’s menu. That being the case, your best option is to fight back. Use any object at your disposal. The sharper and harder the better. Aim for the nose.
- Websites: See the Glacier National Park Travel Guide and Yellowstone Bearman websites for more information on bear attacks.
Ticks
Ticks are blood-sucking parasites that are generally encountered when walking through long grasses or overgrown, brushy terrain.
If you take the necessary precautions and are diligent in your “body checks”, they represent more of an inconvenience than a serious threat to your health. The key is to get them early.
Six Preventative Measures
1. Choice of Attire: Appropriate clothing is your best defence in tick country. A hat, pants and a long sleeve shirt are ideal. Light coloured items are preferable as they make it easier to spot the little burrowers.
2. Permethrin: If you will be hiking in an area that is known to be tick infested, consider treating your clothing with permethrin in advance.
3. Stick to the Middle of the trail when walking through overgrown, brushy terrain. Ticks love nothing better than to ambush hikers when they come into contact with long grass and low lying bushes.
4. Breaks: When taking breaks in tick country do not sit directly on the ground, particularly in brushy overgrown areas.
5. Repellent: For exposed areas of the skin, consider applying insect repellent with 30% DEET. I have found that anything with a higher percentage than this is overkill. Note that DEET is not as effective against ticks as permethrin, but the latter should ONLY be used on clothes.
6. Regular Body Checks: In addition to the widely recommended full body check at day’s end, I generally do a series of brief revisions every 30 to 60 minutes whilst hiking through tick infested areas. Why so often? Ticks usually spend about an hour (sometimes less) crawling about before they begin burrowing into your skin. The key is to get them before they start digging. Three points to note:
A. By being diligent about checking regularly you significantly minimise the probability of being bitten.
B. If you are bitten, chances are you can catch and extract (see below) the little bugger before he is well and truly embedded.
C. If like myself you are a “shorts” rather than a “pants” hiker, you need to check more often than your trousered brethren.
Treatment
- Remove with tweezers. Press the blades firmly against the skin, one each side of the tick’s head, and then pull the tick straight out. Be careful not to twist, as this could result in leaving part of the tick embedded in your skin, which could in turn lead to infection.
- Apply antiseptic solution to the area.
- Tick-borne Illness: If you are feeling below par a couple of weeks after been bitten, you may have contracted a tick-borne illness such as lyme disease. In such cases, it is recommended to seek medical advice ASAP.